Understanding the diy wood slat wall
What is a diy wood slat wall?
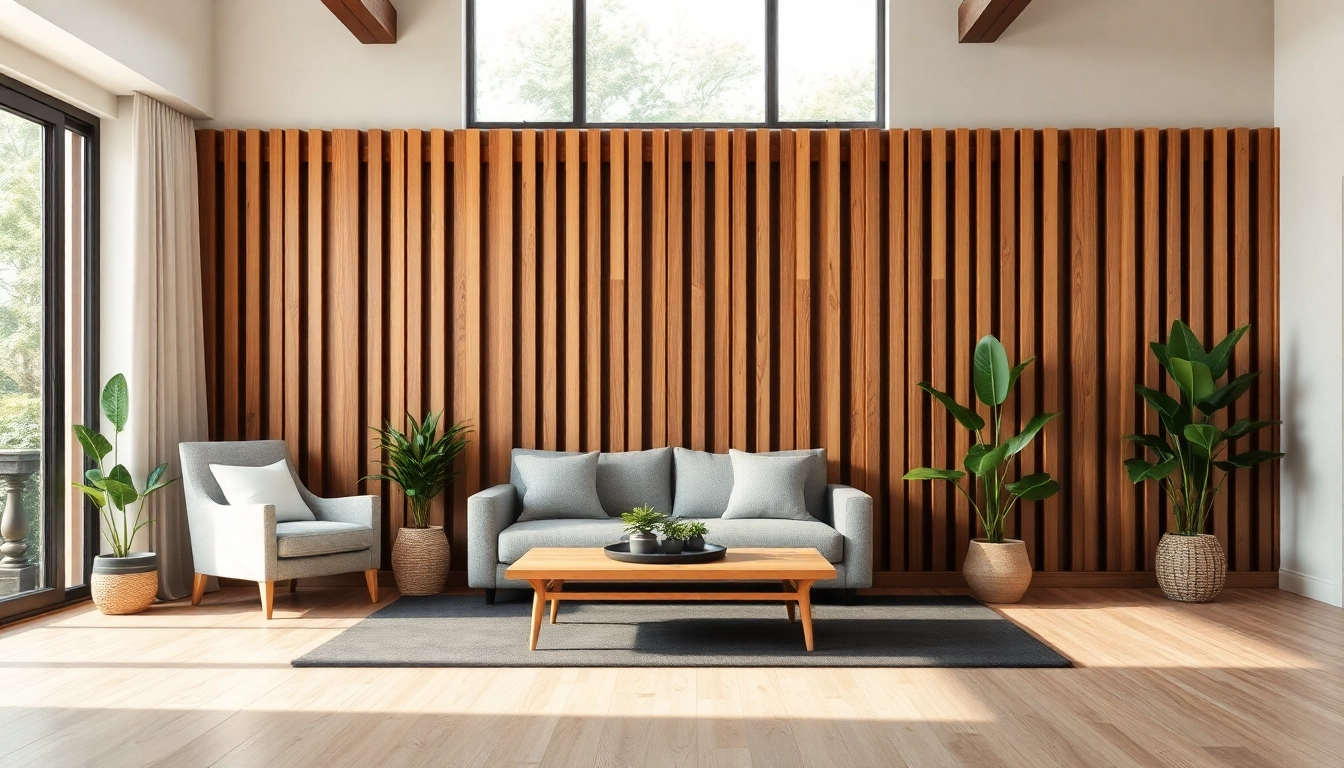
A diy wood slat wall is an innovative design element that transforms any space by adding texture, warmth, and modernity. Comprising vertical or horizontal wooden slats arranged in a visually appealing pattern, these walls serve various functional and aesthetic purposes. They can be utilized not only as a striking backdrop for furniture but also as sound dampeners. This design trend has been gaining popularity in contemporary interiors, particularly in homes seeking a minimalist yet inviting ambiance. In both residential and commercial settings, the diy wood slat wall can add character and individuality.
Benefits of a diy wood slat wall
Creating a diy wood slat wall offers numerous benefits that can enhance any interior design project:
- Acoustic Control: One of the primary advantages is its ability to absorb sound, making spaces feel quieter and more private.
- Customization: With countless wood types, stains, and finishes available, every diy wood slat wall can be uniquely tailored to match the decor and personality of the home.
- Aesthetic Appeal: The natural texture of wood adds warmth, helping to create a cozy atmosphere.
- DIY Potential: The project can be completed by homeowners themselves, providing a sense of accomplishment and savings on labor costs.
- Versatility: These walls work well in various environments, from living rooms and home theaters to offices and cafes.
Popular styles and designs
When embarking on a diy wood slat wall project, various styles and designs can be explored:
- Vertical Slats: This classic approach emphasizes height, making the room appear larger and more airy.
- Horizontal Slats: They create a sense of width and openness, perfect for small spaces needing a broader feel.
- Mixed Patterns: Combining different slat widths and colors can create dynamic, eye-catching designs.
- Backlit Slats: Integrating LED lighting behind slats offers a stunning visual effect while highlighting the texture of the wood.
- Painted Slats: Consider painting slats in vibrant colors or muted tones to match the general color scheme of your space.
Materials Needed for Your diy wood slat wall
Choosing the right wood type
The first step in creating a successful diy wood slat wall is selecting the right type of wood. Different species provide varying aesthetics, durability, and costs:
- Pine: Affordable and widely available, pine is an excellent choice for beginners, providing a light finish that’s easy to stain or paint.
- Plywood: For a more modern look, plywood offers versatility. Different finishes are available, and it’s structurally sound.
- Maple: Known for its sleek appearance and durability, maple can handle wear and tear and retains a beautiful finish.
- Walnut: If seeking a more luxurious look, walnut offers striking dark hues and unique grain patterns but comes at a higher cost.
- Reclaimed Wood: Incorporating reclaimed wood adds a rustic charm while promoting sustainability.
Essential tools for installation
To successfully complete your diy wood slat wall, a few essential tools are necessary:
- Measuring Tape: To ensure proper measurements and cuts for each slat.
- Level: Helpful for aligning slats evenly, ensuring a professional appearance.
- Circular Saw or Miter Saw: For making precise cuts in wood slats.
- Nail Gun or Hammer: Required for securing the slats to the wall.
- Stud Finder: To locate studs in the wall for secure attachment.
Calculating material costs
Before diving into the project, it’s vital to calculate material costs to stay within budget:
- Measure Your Wall: Determine the total area where you intend to install the slats.
- Determine Slat Width and Spacing: Decide how closely you want the slats to be spaced.
- Calculate the Number of Slats Needed: Based on the wall dimensions, estimate how many slats you will need.
- Price the Wood: Check current prices per linear foot or board foot for your chosen wood type.
- Add in Costs for Tools and Additional Materials: Factor in any tools you may need to purchase or rent, along with any additional materials like adhesive or paint.
Step-by-Step Installation Guide
Preparing the wall for slats
Preparation is critical for a successful installation. Follow these steps:
- Choose the Location: Determine where you want the slat wall and prepare the area by removing any furniture.
- Repair the Wall: Fill in any holes or imperfections for a smooth surface.
- Clean the Surface: Ensure the wall is clean and free from dust or debris that could affect adhesion.
Cutting and measuring the wood slats
Next, cutting and measuring the slats accurately is essential:
- Measure and Mark: Using the measuring tape, mark the desired lengths on each wood piece.
- Cut Slats: With a circular saw or miter saw, carefully cut along the marked lines.
- Sand Edges: Smooth the edges of each slat to prevent splinters or sharp edges during installation.
Securing slats to the wall
Now the fun part begins—securing slats onto the wall:
- Find the Studs: Use a stud finder to locate wall studs where you’ll attach the slats for optimal support.
- Mark Guidelines: Use a level to draw horizontal or vertical lines indicating where each slat will be positioned.
- Attach the Slats: Secure the slats to the wall using a nail gun or hammer, following the guidelines. Space slats evenly, based on your design plan.
- Check Alignment: Regularly check for level throughout the installation to ensure a professional appearance.
Finishing Touches for Your diy wood slat wall
Staining and sealing wood slats
Once all slats are installed, it’s time to enhance their appearance further:
- Choose a Stain: Decide on a wood stain that complements your decor. Test it first on a scrap piece to view the outcome.
- Apply Stain: Using a brush or cloth, apply the stain evenly across all visible surfaces of the slats.
- Seal the Wood: After the stain has dried, apply a sealing coat to protect from moisture and wear.
Adding decorative elements
Enhance the look of your diy wood slat wall with thoughtfully added decorations:
- Artwork: Hang framed art or photographs that align with your style.
- Shelf Brackets: Install floating shelves for functional decor items like plants, books, or knick-knacks.
- Hanging Plants: Add greenery with wall-mounted plant holders or woven wall hangers.
Maintaining your wood wall over time
Long-lasting beauty requires proper maintenance. Consider these tips:
- Dust Regularly: Use a microfiber cloth to gently dust your wood slat wall.
- Spot Clean: Address any stains immediately with a damp cloth. For stubborn stains, use a mild detergent.
- Reapply Sealant: Every few years, consider reapplying a sealant, especially in humid environments, to protect the wood.
Creative Uses for a diy wood slat wall
Using slat walls in different environments
The beauty of a diy wood slat wall is its versatility. Here are several creative uses:
- Living Room: Create a stunning feature wall behind the sofa, enhancing your seating area.
- Home Office: Use slats as a backdrop for a desk, creating a focused work environment.
- Retail Spaces: Enhance the shopping experience in boutiques by creating inviting showcase backdrops.
Incorporating lighting into your design
Integrating lighting can elevate the aesthetic appeal of your diy wood slat wall:
- Acrylic Uplighting: Place LED strips at the base of slats for a soft glow that accentuates the wood grain.
- Wall Sconces: Install decorative sconces to layer light and enhance the texture of the wall.
- Backlit Panels: Create a striking effect by installing lights behind some slats for a dramatic flair.
DIY decor ideas to complement your wall
To fully enrich the space, consider these DIY decor ideas:
- Macramé Hangings: Add macramé wall hangings or textile art to soften the wood’s appearance and add contrast.
- Custom Wall Shelves: Build unique shelves from leftover slats to create cohesive decor while maximizing space.
- Framed Mirrors: Mount a mirror with a rustic frame for visually expanding the room while reflecting light.